• About Me
  • Awards
  • Breakfast
  • Recipes

Malar's Kitchen

~ My kitchen Experiments

Monthly Archives: March 2015

Muttai Poriyal/Egg stir Fry

26 Thursday Mar 2015

Posted by Malar in Food, Indian Breakfast, Recipe, Side Dish

≈ 26 Comments

Tags

easy muttai poriyal, egg masala poriyal, Egg Stir Fry, how to make muttai poriyal, Indian style egg recipe, muttai poriyal

I grew up as a vegetarian. Occasionally I take eggs, an exception in my vegetarian diet 😉 . I do add them in baking. My hubby doesn’t mind eating eggs often as it is a good source of protein. But I can only make Indian style egg gravy and don’t know many options with egg. This was one of his recipes which I learnt. He makes it much spicier than I do 😉 So a recipe from my hubby’s book 🙂

muttai_poriyal muttai_poriyal_1 muttai_poriyal_2

Ingredients:

Eggs: 6

Onion : 1/2 of a large chopped

Green Chili : 2 small chopped finely

Ginger : a small piece crushed

Turmeric Powder : a generous pinch

Pepper Powder : 1 teaspoon

Oil : 1 1/2 teaspoon

Mustard Seeds : 1/4 teaspoon

Urad Dal : 1/4 teaspoon

Curry Leaves : Few

Cilantro Leaves : Few

Salt : as needed

Method:

  • Break eggs and whisk well in a bowl.
  • Heat oil in a pan. When hot add mustard seeds, urad dal.
  • When it crackles, add curry leaves. When it splutters, add chopped onions, green chili, ginger.
  • Add turmeric powder and mix. Keep the heat in low medium.
  • Saute well for 2 mins.
  • Now add pepper powder, salt and saute for 2 more mins.
  • Now add the whisked eggs.
  • Mix well, make sure heat is in low medium.
  • Keep cooking until eggs combines well.
  • At one stage, egg gets cooked and you can touch and see the soft fluffy eggs.
  • Stop and add cilantro leaves.
  • Do not cook more time eggs may turn rubbery.
  • Goes well with rice. I served with rasam rice 🙂

You can vary with red chili powder. Taste changes a bit different. It can served with bread for breakfast as well.


Advertisement

Share this:

  • Twitter
  • Facebook
  • Tumblr
  • Pinterest
  • Reddit
  • Pocket

Like this:

Like Loading...

Rasam –(without rasam powder)

24 Tuesday Mar 2015

Posted by Malar in Food, Recipe, Side Dish

≈ 30 Comments

Tags

Easy rasam recipe, how to make rasam, Instant rasam, Rasam, rasam for sore throat, Rasam without rasam powder, recipe for sore throat, South Indian Style Rasam, Toor Dal Rasam

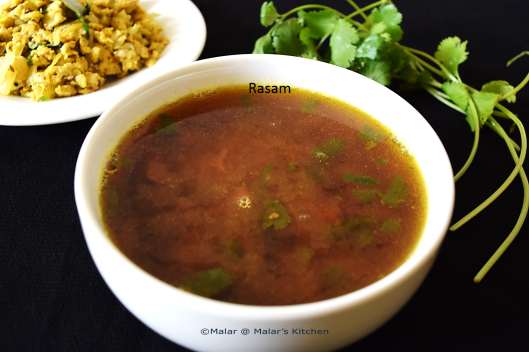
Rasam is an inevitable food in south India. When my friends say that I can’t prepare rasam as I don’t have rasam powder stock at home, I always ask them to prepare this recipe. When anyone gets cold this is the best food to be prepared. This soothes the throat so well.

rasam rasam_1

Ingredients:

Tamarind : a small lemon size

Tomato : 1

Garlic : 4 pods

Black Pepper: 3/4 tablespoon

Cumin Seeds : 3/4 tablespoon

Water : 3 cups

Toor Dal : 2 tablespoons

Turmeric Powder : a pinch

Oil : 1 1/2 teaspoon

Mustard Seeds : 1/2 teaspoon

Urad dal : 1/2 teaspoon

Curry Leaves : Few

Cilantro Leaves: Few

Salt : as needed

Method:

  • Soak tamarind in 1/4 cup of water.
  • Cut tomato into 2 halves.
  • Boil toor dal with required water and turmeric powder. Once cooked well, stop and set it aside.
  • In blender, add cumin seeds, black pepper, garlic pods and one half of tomato. Blend it to a fine paste.
  • Take tamarind juice, add the above ground paste, salt.
  • Add the remaining half of tomato and smash with hands.
  • Add around 1 1/2 cup water and get the liquid consistency. Check for salt.
  • In a pan heat oil, add mustard seeds, urad dal. When it crackles add curry leaves.
  • Now add the the rasam water prepared, let it boil.
  • When it starts boiling add cooked toor dal and let it get boiled for 2 mins.
  • Switch off and add cilantro leaves and mix.
  • Now rasam is ready. Have it with hot rice 🙂

Share this:

  • Twitter
  • Facebook
  • Tumblr
  • Pinterest
  • Reddit
  • Pocket

Like this:

Like Loading...

Qunioa Idli

23 Monday Mar 2015

Posted by Malar in Food, Indian Breakfast, Recipe

≈ 31 Comments

Tags

how to make Quinoa dosa, how to make Quinoa Idli, idli recipe, Indian style Quinoa recipe, Quinoa, Quinoa dosa, Quinoa Idli, Quinoa Indian recipes, Quinoa Indian style recipe

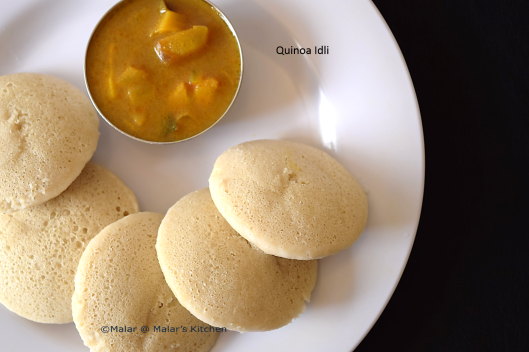
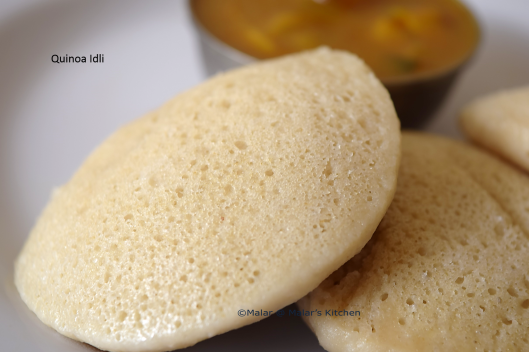
I have seen a lot of friends posting on Quinoa dosa and wanted to try. Then I thought why not make it just like regular idli. Just like Millet Idli, I made these idli’s and we absolutely did not feel the difference. I did make dosa with the remaining batter and turned out super awesome.

To check on how to make normal idli/dosa batter, cilck here.

For millets Idli, cilck here.

For some chutney recipe, check below

  • Peanuts Chutney
  • Celery Chutney
  • Onion Chutney/Vengaya Chutney
  • Ginger Chutney/Allam Pachadi
  • Coconut Chutney
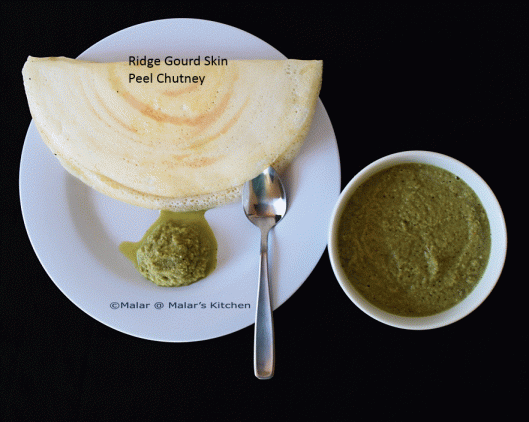
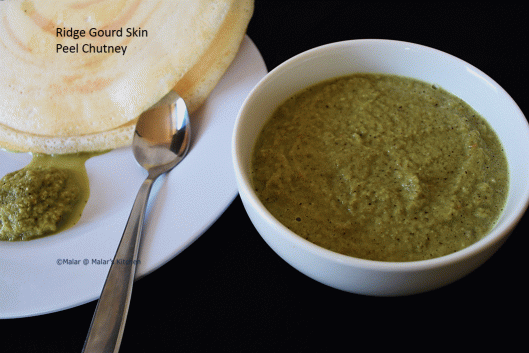
  • Peerkangai Thol Thugayal/Ridge Gourd Skin Peel Chutney

Quinoa_Idli Quinoa_Idli_1 Quinoa_Idli_2

Ingredients:

Quinoa: 1 cup

Idli Rice : 1 cup

Urad dal : 1/2 cup

Salt : as needed

Water : as needed

Method:

  • Soak quinoa, idli rice together overnight.
  • Soak urad dal for 1 hr.
  • Grind urad dal to fine batter, place it in a bowl. Use little water to grind. Do not make it watery.
  • Grind the quinoa and rice together and grind with little water, as it easily leaves a lot of water.
  • Combine all of them together with around 1/2 tablespoon of salt.
  • Mix well and ferment it overnight.
  • Next day without mixing, grease idli plate and pour batter.
  • Steam for 12 to 15 mins.
  • Serve with any chutney or sambar.

After a day’s time, I added a bit more water and mix batter. Use this for Dosa. I forgot to take pics 🙂 will update the next time I prepare this dosa.

Share this:

  • Twitter
  • Facebook
  • Tumblr
  • Pinterest
  • Reddit
  • Pocket

Like this:

Like Loading...

Kothamalli Thokku/Coriander Thokku

21 Saturday Mar 2015

Posted by Malar in Food, Recipe, Side Dish

≈ 24 Comments

Tags

Cilantro, cilantro leaves, Cilantro thokku, Coriander Leaves Pickles, Coriander Thokku, Kothamalli Thokku, South Indian Thokku, thokku recipe

Kothamalli thokku is one of my favorite. Recently there was an offer of 5 large bunches for 1$, so purchased it with no hesitation 😉 My hubby was like what will you do with so much of cilantro. I said let me make thokku. So here it is 🙂 Not a new recipe today, just a traditional one.

Kothamalli_Thokku_2 Kothamalli_Thokku_1 Kothamalli_Thokku

Ingredients:

Cilantro/Kothamalli : 5 cups packed

Urad dal : 3 tablespoons

Red Chili : 4

Tamarind : one lemon sized

Salt : as required

Water : as required

Oil : 3 tablespoons( I prefer sesame/gingely oil)

Asafoetida/Hing: 1/4 teaspoon

Mustard Seeds : 1/4 teaspoon

Method:

  • Wash and dry the cilantro leaves in paper towel to absorb the excess water.
  • Cut the thick stems(end portion of cilantro) just a bit, not too much.
  • Heat 1 tablespoon oil in a pan, when hot add urad dal, red chili, asafoetida and tamarind.
  • Saute till nice golden brown color.
  • Stop and let it cool.
  • Once cool, grind the above along with cilantro leaves , salt and required water to a fine paste.
  • Do not add too much of water, just enough to make a paste.
  • Now heat remaining oil in a large pan. When hot add mustard seeds.
  • When it crackles, add the ground paste.
  • Keep stirring , it will get cooked.
  • In case it gets stuck at the bottom or burnt, add more oil , mix and cook.
  • At one stage it will come together without sticking to the sides of the pan.
  • Now thokku is ready. Store in an air tight container in refrigerator.

Serve with either rice, roti, idli or dosa. I have used much less oil than I have mentioned above 😉 You can always increase oil, so the shelf life also increases.

Share this:

  • Twitter
  • Facebook
  • Tumblr
  • Pinterest
  • Reddit
  • Pocket

Like this:

Like Loading...

Ragi Murukku/Chakkli (Baked and Deep fried)

16 Monday Mar 2015

Posted by Malar in Baking, Food, Recipe, Snack

≈ 35 Comments

Tags

Baked murukku recipe, Baked Ragi chakkli, Baked Ragi Murukku, Finger millet recipes, Ragi Chakkli, Ragi Murukku

My love towards Ragi continues. This was on my list of to do from a very long time. Use of oil totally scares me out. My hubby will never want me to use sunflower oil. But for Indian cooking specially deep frying, this is the best suited oil. He kept ruling out the option. One fine day when I went for shopping alone, I got one bottle of sunflower oil. He found it the next day in kitchen and started questioning me 😀 In between I gotta enjoy some pleasures isn’t it 😉

So here is the both baked and deep fried version. Warning, baked version doesn’t taste exactly the same way as deep fried version. It tends to break soon as well. But yes for health concerns they are the best. But I liked the baked version equally good as deep fried. Do give it a try 🙂

Ragi_Murkku Ragi_Murkku_1 Ragi_Murkku_Baked

Ingredients:

Ragi Flour : 1 Cup

Rice Flour : 1/2 cup

Garbanzo Flour(Besan) : 1/2 cup ( you can use Roasted gram flour/pottukadalai flour instead)

Butter : 2 tablespoons

Cumin Seeds : 1 teaspoon

Red Chili Powder : 1 teaspoon ( I felt it was less, you can increase the quantity)

Asafoetida/Hing : 1/2 teaspoon

Salt : 1/2 teaspoon

Water : as needed

Oil : as needed to deep fry

Method:

  • Mix all the flours, cumin seeds, red chili powder, asafoetida, salt, butter.
  • Add water and form a nice dough, Dough should not be thick or watery. Make sure it is moist.
  • Keep it covered for 10 to 15 mins.

For deep fried version:

  • Heat oil in a pan.
  • Take the chakkli maker/Murukku katai, fill in with dough. Start pressing in round shape.
  • You can press it in a big spoon(karandi).
  • When oil is hot, slowly slide in the spoon where the chakkli is pressed.
  • It would start cooking. Make sure the oil in in medium hot. It should not be too hot or less.
  • Turn sides after 2 to 3 mins. When it is done you will find that the oil sizzling sound stops. At that time take it out and place it in a paper towel to drain the excess oil.
  • Similar way place cook other chakkli/murukku.

For baked version:

  • Preheat oven to 350F.
  • Get a baking sheet ready, place a parchment paper and spray oil over it.
  • Now start pressing murkku/chakkli from the maker. Give enough space between each of them.
  • Bake it for 12 mins first side. Take out flip sides and bake for 15 mins.
  • Then take out and cool.

Enjoy the healthy teatime snack 🙂

Share this:

  • Twitter
  • Facebook
  • Tumblr
  • Pinterest
  • Reddit
  • Pocket

Like this:

Like Loading...

Samai Pongal/Little Millet Pongal

13 Friday Mar 2015

Posted by Malar in Food, Indian Breakfast, Recipe

≈ 27 Comments

Tags

Coconut Chutney, how to make samai pongal, Little Millet Pongal, Little Millet Recipes, Millet, millets, pongal recipe, Samai Pongal, Samai recipes, Samai Venpongal

In my childhood or even few years back, I never had the awareness to millets. The only millet which we knew was Ragi/Finger Millet which is quite popular in my place. But once I came to know the health benefits of different types of millets, I want to consume more of these and reduce rice which is the primary food for any south Indian. It also surprises me that millets have been used in ancient days a lot and in the passage of time, rice has taken the precedence and millets are completely forgotten. I am so glad we have got the awareness.

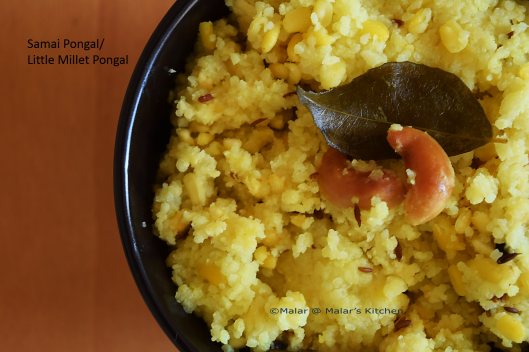
In our recent visit to Indian stores, I found a pack of samai(Little Millets) , I was so excited and grabbed it. We can easily prepare any recipe that is made with rava(semolina), replace with millets. Today I made this samai pongal and I absolutely loved it. I made it as a one pot meal, so it is easier and faster, you can follow the traditional method of making pongal.

It goes well with coconut chutney or peanuts chutney. Sambar is an ideal choice for pongal.

Samai_Pongal


Samai_Pongal_1Samai_Pongal_2

Ingredients: (serves 2)

Samai/Little Millet : 1 1/4 cup

Moong Dal : 1/2 cup(washed)

Ghee : 1 tablespoon(you can replace with normal oil)

Cumin Seeds/Jeera : 1/4 teaspoon

Black Pepper: 1/4 teaspoon

Ginger : 1 small piece chopped finely

Cashews : Few

Curry Leaves : Few

Water : 5 cups

Salt : as required

Turmeric Powder : a pinch

Method:

  • Heat ghee/oil in a pressure cooker.
  • When hot, add cumin seeds, black pepper. When they crackle, add curry leaves and ginger, cashews.
  • Saute till cashews turn golden color.
  • Next add the moong dal, saute for a minute.
  • Next add samai as well and saute for 2 to 3 mins. Mix turmeric powder as well.
  • Add the above mentioned water , salt.
  • Cook for 4 whistles.
  • Let it cool down, open mix well and serve with any chutney or sambar.

In case you fee it is very dry, you can add some hot water and mix. I like it dry and my hubby likes it watery 😉

Enjoy this healthy breakfast which is quite heavy!!!


Share this:

  • Twitter
  • Facebook
  • Tumblr
  • Pinterest
  • Reddit
  • Pocket

Like this:

Like Loading...

Peerkangai thol thugayal/Ridge Gourd Peel Chutney

10 Tuesday Mar 2015

Posted by Malar in Food, Indian Breakfast, Recipe, Side Dish

≈ 31 Comments

Tags

easy Indian Chutney recipes, Indian Chutney, Indian Chutney recipes, peerkangai skin chutney, Peerkangai thol thugayal, ridge gourd, Ridge Gourd chutney, Ridge gourd skin health benefits, Ridge Gourd skin peel, Ridge gourd skin peel chutney, south Indian breakfast, South Indian Style chutney, tasty chutney

Do you throw away the skin peel of ridge gourd? They are extremely rich in dietary fiber and low in calories. Do not throw them away. You can make this easy and tasty chutney which is great with any south Indian breakfast.

Ridge_Gourd_Skin_Chutney Ridge_Gourd_Skin_Chutney_1 Ridge_Gourd_Skin_Chutney_2

It goes well any idli, dosa. Here are few more options from my blog.

Millets Idli

Adai/Lentil Pancakes

Pesarattu/Moong Bean dosa

Tomato Dosa(No fermentation)

Arisi Uoma/Idli Rava Upma

Ingredients:

Ridge Gourd Peel : Skin Peel from one large gourd

Grated coconut : 2 tablespoons

Onion : 1/3 of a large

Tamarind : a very small piece

Green Chili : 2 small

Salt : as needed

Water : as needed

Oil : 1 1/2 teaspoons

Mustard seeds : 1/4 teaspoon

Urad dal : 1/4 teaspoon

Curry leaves : Few

Method:

  • Heat oil in a pan, when hot add mustard seeds, urad dal. When it turn golden color, add curry leaves.
  • Next add the onions. Saute for 2 to 3 mins. Add the ridge gourd skin peel, tamarind and saute for 5 mins.
  • It would get cooked in 5 mins, next stop and add the grated coconut. Mix well, it gets cooked in the heat of the pan and stove.
  • Let it cool.
  • When it cools down, in a mixer, grind the above with salt and water. Use water as per chutney consistency.

Easy thugayal is ready. Serve with idli/dosa.

Share this:

  • Twitter
  • Facebook
  • Tumblr
  • Pinterest
  • Reddit
  • Pocket

Like this:

Like Loading...

Vangi Baath/Eggplant Rice

04 Wednesday Mar 2015

Posted by Malar in Food, Recipe, Rice

≈ 30 Comments

Tags

brinjal rice, Eggplant, eggplant rice, how to make vaangi baath powder, how to make vangi baath powder, kathirikai saatham, south Indian style rice variety, Vangi baath, Vangi Baath Powder, variety rice

Vangi baath is a specialty in Karnataka. Recently I came to know that , it is also famous in Maharashtra. This version is based on Karnataka style. You just need get the vangi baath powder ready. We do get this powder ready made available in all Indian stores. But they are quite easy to make and you can store it in airtight container for a month in refrigerator. Those who don’t like eggplant will also love this rice 🙂

You can serve it with any raita or simply yogurt. Some raita options from my blog for you

  • Spinach Raita
  • Cucumber Raita

Few more variety rice options from my blog, please click link below

Variety Rice

Vangi_Baath

Vangi_Baath_1Vangi_Baath_2

Ingredients:

Rice : 2 cups

Eggplant/Brinjal/Kathirikai : 7 to 8 small

Oil : 1 1/2 teaspoons

Mustard seeds : 1/4 teaspoon

Curry Leaves : Few

Turmeric Powder : 1/ teaspoon

Salt : as per need

Water : as per need

Tamarind paste : 1 tablespoon(thick)

To make Vangi Baath Powder :

Oil: 1 1/2 teaspoon

Urad Dal : 1 1/2 teaspoon

Channa dal : 1 tablespoon

Red Chili : 4

Curry Leaves : Few

Sesame Seeds : 1 teaspoon

Coriander Seeds : 1 tablespoon

Fenugreek Seeds/Methi seeds : 1/4 teaspoon

Black Pepper : 1/4 teaspoon

Cinnamon Stick : 1 small

Cloves : 2 to 3

Grated Coconut : 1 tablespoon

Method:

For Vangi baath Powder :

  • Heat oil(1 1/2 teaspoon) in a small pan, when hot add channa dal, urad dal. When they turn golden brown, place it aside in a plate. Make sure to drain the oil.
  • With the remaining oil, add coriander seeds, cinnamon sticks, cloves. When they pop, transfer to the plate.
  • With the remaining oil, fry pepper, methi seeds, red chili. When they pop, add sesame seeds. Now this will also pop. Stop and add grated coconut.
  • Now let all these cool. When they are cool, grind to a fine powder. We can store this powder in an airtight container for 1 month in fridge.

To make Vangi baath:

  • Cook rice for 1 cup rice with 1 1/2 cup water. Let it cool.
  • Slit eggplant/brinjal and cut to pieces.
  • Heat oil of 1 1/2 teaspoons in a large pan.
  • When hot, add mustard seeds. When it crackles, add curry leaves and eggplant/brinjal.
  • Saute for 3 to 4 mins. Add turmeric powder, salt and mix well. Saute for another 2 mins.
  • Now mix 2 teaspoons of the vangi baath powder. Also mix the tamarind paste with water. I used only around 1/2 cup of water.
  • Let it cook till soft. Check for salt. Do not over cook eggplant. Else  it becomes very mushy.
  • When eggplant is cooked well, mix rice with it and combine well.

Vangi baath is ready. Serve with any raita or yogurt.


Share this:

  • Twitter
  • Facebook
  • Tumblr
  • Pinterest
  • Reddit
  • Pocket

Like this:

Like Loading...

Dilkush/Coconut Raisin stuffed bun

02 Monday Mar 2015

Posted by Malar in Baking, Food, Recipe, Snack

≈ 19 Comments

Tags

Coconut Bun, Dilkush, how to make coconut bun, how to make dilkush, Indian style coconut bun, Iyengar Bakery style Dilkush

Coconut bun is one of my childhood favorite. I used to have at least one piece everyday from bakery 😉 I somehow stopped it in between and found it back in my Bangalore days at Iyengar bakery. Widely called as Dilkush, made with coconut and tutty fruti. Aww how much I used to love them. Now that in US , I have the oven to bake it..why not give it a try. Yep it turned out super awesome… It is a bit long process, but worth every second of it 🙂 I have just added coconut , nuts and raisins. Dilkush is made with tuti fruti. I did not have them in stock, so haven’t added them. Here is the recipe…

Dilkush_1 Dilkush_2Dilkush

Ingredients:

Whole Wheat Flour : 1 cup + 2 tablespoons + extra to dust

All Purpose Flour : 1 cup

Sugar : 3 tablespoons

Salt : 1/4 teaspoon

Water : 1/4 cup

Milk : 1/2 cup

Butter : 1 tablespoon

Yeast : 1 1/4 teaspoon

Filling:

Coconut : 3/4 cup

Cashew+almonds+ raisins  : 1/2 cup ( In case tutti fruti is used reduce cashew and almonds, avoid sugar)

Cardamom Powder : a pinch

Jaggery/Sugar : 1 tablespoon( I used jaggery)

Ghee/Oil : 1 tablespoon

Method:

  • Take lukewarm water, add 1 teaspoon sugar. Mix yeast and set aside for 10 mins.
  • Yeast would froth in 10 mins.
  • Warm up milk before kneading dough.
  • Mix whole wheat flour, all purpose flour, salt, sugar. Sieve it in a medium bowl.
  • Now mix the yeast and milk with the sieved flour.
  • Now knead the dough for 10 mins.
  • In a medium bowl, oil the base and sides, keep the dough and oil the top portion.
  • Cover with a wet towel and place it in a warm place. For me fridge top is the best place to get this done.
  • Leave it for an hour.
  • Now get the filling ready. Heat a pan with either oil or ghee. When hot add chopped cashews, almonds. When it turns slight golden color, add raisins. Let it pop.
  • Now stop heat and add grated coconut and saute in the remaining heat.
  • In case you are adding tutti fruti add it as well.
  • Add jaggery or sugar mix well. Filling is ready.
  • Place a parchment paper over the baking tray, spray with cooking oil and get it ready.
  • After an hour, the dough would double in size. Now punch out the dough. Knead for another 2 to 3 mins.
  • Cut the dough to 2 pieces. Take one piece and make a flat base just like pizza base.
  • Base would be thick enough around a size of 8 inches.
  • Now on top, place the filling. Leave 1/2 cm on the edges. Place this base in the baking tray.
  • With the other portion of dough, flatten similar to the base.
  • Cover it over the base with filling. Pinch the edges. Take a fork and club the edges of both base and top.
  • Cover this as well and set it for 30 mins in a warm place.
  • Have 1 tablespoon of milk and a bit of sugar mixed and ready.
  • Preheat oven to 400F. Before baking, just brush this milk and sugar mix over the top.
  • Bake for 20 to 25 mins. Mine took 25 mins.
  • Cool it, cut and serve 🙂

You can totally use All purpose flour/maida instead of whole wheat flour.

Tutti frutti can be used with only coconut, no need of raisins and cashews.


Share this:

  • Twitter
  • Facebook
  • Tumblr
  • Pinterest
  • Reddit
  • Pocket

Like this:

Like Loading...
Follow Malar's Kitchen on WordPress.com

Enter your email address to follow this blog and receive notifications of new posts by email.

Facebook Page for Malar’s Kitchen

Facebook Page for Malar’s Kitchen

Follow me on Twitter @malarskitchen

My Tweets

All Cooking Sites

All Cooking Sites

Indi Blogger

IndiBlogger - The Largest Indian Blogger Community

myTaste.in

myTaste.in

SheBlog

Smart Indian Women

Very Good Recipes

Very Good Recipes
You can find my recipes on Very Good Recipes

Taste Query

Tasty Query - recipes search engine

Snapshots

This slideshow requires JavaScript.

Categories

  • Awards
  • Baking
  • Beverages
  • Biriyani
  • CHettinad food
  • Food
  • Gravy
  • Guest Post
  • Health Tips
  • Indian Breakfast
  • Paratha/Roti
  • Recipe
  • Rice
  • Side Dish
  • Snack
  • Sweets/Desserts
  • Tips
  • Uncategorized

Archives

  • January 2018 (1)
  • December 2017 (1)
  • April 2016 (1)
  • December 2015 (3)
  • November 2015 (4)
  • October 2015 (3)
  • May 2015 (1)
  • April 2015 (10)
  • March 2015 (9)
  • February 2015 (12)
  • January 2015 (11)
  • December 2014 (2)
  • November 2014 (3)
  • October 2014 (12)
  • September 2014 (20)
  • August 2014 (25)
  • July 2014 (31)
  • June 2014 (24)
  • May 2014 (20)
  • April 2014 (8)
  • March 2014 (11)
  • February 2014 (5)
March 2015
M T W T F S S
 1
2345678
9101112131415
16171819202122
23242526272829
3031  
« Feb   Apr »

Foodie Blogger

The Foodie Blog Roll

Blog at WordPress.com.

Privacy & Cookies: This site uses cookies. By continuing to use this website, you agree to their use.
To find out more, including how to control cookies, see here: Cookie Policy
  • Follow Following
    • Malar's Kitchen
    • Join 380 other followers
    • Already have a WordPress.com account? Log in now.
    • Malar's Kitchen
    • Customize
    • Follow Following
    • Sign up
    • Log in
    • Report this content
    • View site in Reader
    • Manage subscriptions
    • Collapse this bar
 

Loading Comments...
 

    %d bloggers like this: